
Introduction
Nothing brings a hunting crew together like a steaming bowl of venison camp chili recipe! Whether you’re out in the wilderness or cooking at home, this hearty, protein-packed meal warms both the stomach and soul. With tender wild game meat, bold spices, and slow-cooked perfection, this dish is a must-have for any deer camp gathering.
In this article, we’ll cover everything from ingredient selection and preparation techniques to cooking methods and serving suggestions. Plus, we’ll share tips for adjusting flavors, storing leftovers, and answering common questions about campfire venison chili.
Let’s get started with the first part: understanding the tradition and benefits of this delicious venison camp chili recipe!
The Tradition and History of Venison Camp Chili Recipe
Why Venison Camp Chili Recipe Is a Deer Camp Staple
The History of Venison in Traditional Hunting Camps
For centuries, hunters have relied on venison as a staple protein source, especially in remote locations where fresh meat was hard to come by. Native Americans and early settlers used every part of the deer, ensuring nothing went to waste. Over time, venison became a key ingredient in hearty stews and chili recipes, providing essential nutrients after long days of hunting.
How Venison Camp Chili Recipe Became a Favorite at Campfires
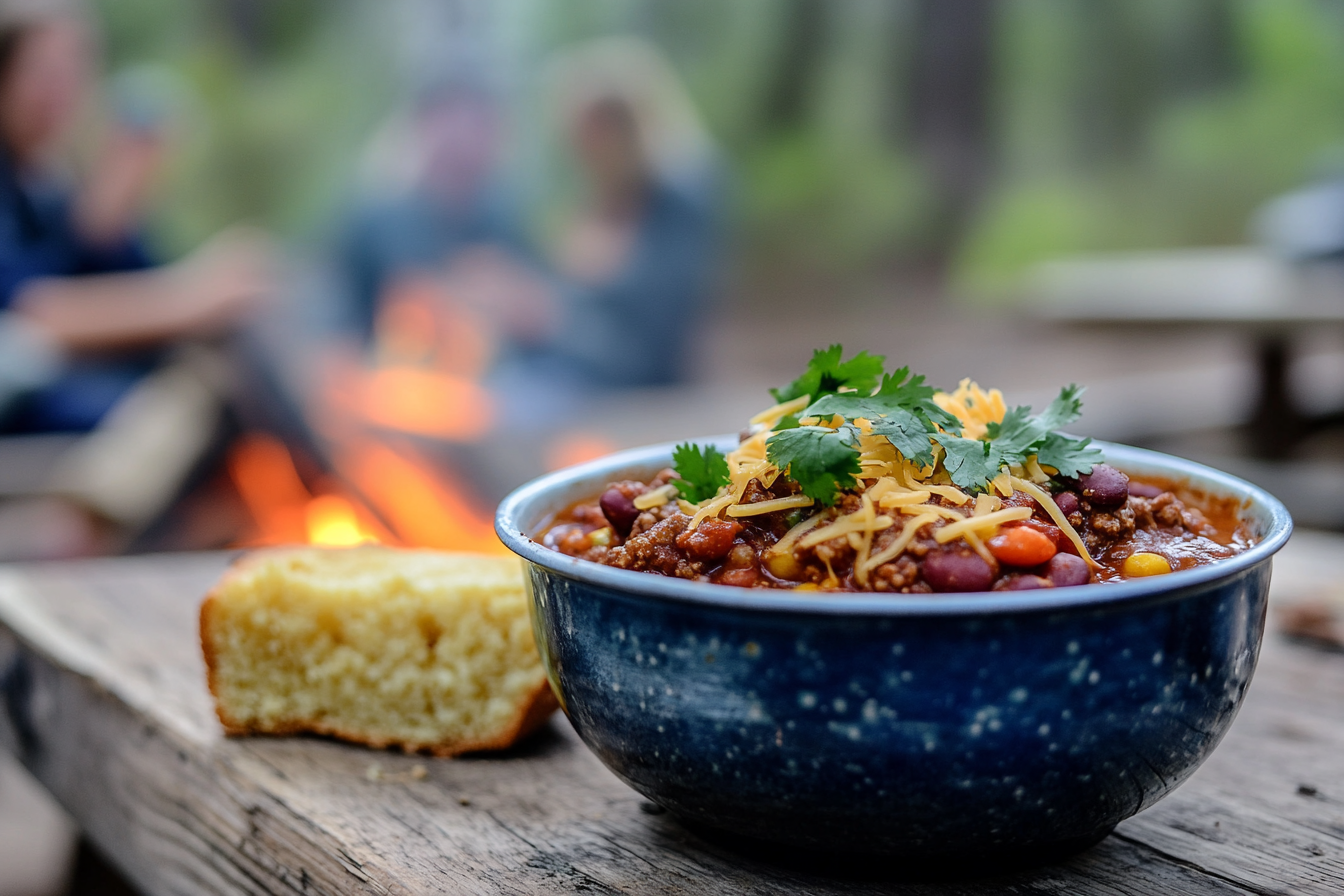
Imagine this: a roaring fire, the crisp autumn air, and a bubbling pot of venison camp chili recipe filling the campsite with mouthwatering aromas. Chili has long been a go-to meal for hunting camps, not only because it’s easy to make in large batches but also because it allows flavors to develop beautifully over hours of slow cooking.
Unlike quick meals, campfire venison chili is all about patience. The longer it simmers, the richer it becomes, making it the perfect dish for a laid-back evening around the fire. Plus, it’s packed with protein, making it an excellent choice for refueling after a long hunt.
Why Choose Venison for Chili?
Nutritional Benefits of Venison
Venison isn’t just a flavorful alternative to beef—it’s also one of the healthiest meats available. It’s leaner, lower in saturated fat, and packed with essential nutrients like iron, zinc, and B vitamins. Compared to beef, venison chili is a healthier option without sacrificing taste or texture.
Additionally, wild game is free of hormones and antibiotics, making it a cleaner source of protein. It’s ideal for those looking to eat naturally while still enjoying rich, meaty flavors.
Flavor Profile Compared to Other Meats
If you’ve never cooked with venison before, you might wonder how it differs from beef or turkey. While some describe venison as having a slightly gamey taste, this can be minimized with the right preparation and seasoning.
Venison’s bold flavor pairs beautifully with smoky, spicy, and slightly sweet elements—making it a perfect candidate for chili. Unlike beef, which has a higher fat content, venison is leaner, requiring a bit more attention to prevent dryness. However, by cooking it low and slow, the meat remains tender and absorbs the flavors of the broth and spices.
Key Ingredients for the Best Venison Camp Chili Recipe
A great venison camp chili recipe starts with the right ingredients. From selecting the best cut of wild game meat to choosing the perfect blend of spices, every component plays a crucial role in building layers of rich, smoky, and savory flavors. Let’s break down what you need to create a chili that’s not only delicious but also hearty enough to satisfy a hungry hunting crew.
Meat Selection
Choosing the Best Venison for Campfire Chili Recipe
Not all cuts of venison are created equal when it comes to chili. Because chili is a slow-cooked dish, the best cuts are those that break down over time and absorb flavor beautifully. Here’s what works best:
- Ground Venison – The easiest option, ensuring a quick cooking process and even distribution of flavors.
- Venison Shoulder or Neck – These tougher cuts become melt-in-your-mouth tender when slow-cooked.
- Venison Stew Meat – Pre-cut cubes of venison add texture and heartiness to the dish.
Tip: Since venison is very lean, consider mixing it with a small amount of beef tallow or olive oil to enhance moisture and texture.
Vegetables and Legumes
Traditional Vegetables Used in Chili
A robust campfire chili isn’t complete without a medley of fresh vegetables. They not only add depth of flavor but also enhance the dish’s nutritional profile. Here’s what you’ll need:
- Onions – A staple ingredient that adds natural sweetness and depth.
- Garlic – Boosts the overall aroma and flavor of the chili.
- Bell Peppers – Provides a slight sweetness and balances the heat.
- Tomatoes – Canned or fresh, they form the base of the chili’s rich broth.
The Great Bean Debate: To Include or Not?
Some chili purists argue that true camp chili should never contain beans, while others enjoy the added texture and protein. Ultimately, it’s a personal choice!
- Kidney Beans – The classic chili bean, known for its firm texture.
- Black Beans – A slightly softer, earthier alternative.
- Pinto Beans – Creamy and mild, they blend well into the sauce.
If you’re sticking to a traditional Texas-style venison chili, skip the beans and focus on the meat and spices!
Spices and Seasonings
Core Spices for Authentic Flavor
The magic of chili lies in its seasoning. A carefully balanced blend of spices transforms a basic stew into an explosion of bold flavors. Here’s what you’ll need:
- Chili Powder – The star of the show, adding warmth and depth.
- Cumin – A must-have for that smoky, slightly nutty taste.
- Paprika – Enhances color and adds a mild heat.
- Garlic Powder & Onion Powder – Boosts overall savoriness.
- Oregano – Brings a subtle herbal note to the mix.
Optional Additions for Heat and Depth
Want to dial up the spice? Try these:
- Cayenne Pepper – For an extra kick of heat.
- Smoked Chipotle Powder – Adds a deep, smoky complexity.
- Cocoa Powder or Dark Chocolate – Enhances richness and adds an unexpected depth of flavor.
Pro Tip: Toasting your spices in a dry pan for 30 seconds before adding them to the chili intensifies their flavor!
Liquids and Bases
The Role of Broth, Tomato Products, and Secret Ingredients
A great venison chili needs a well-balanced liquid base. Without enough moisture, the chili will turn dry; too much, and it becomes soupy. Here’s what works best:
- Beef or Venison Broth – Adds depth and umami flavor.
- Crushed or Diced Tomatoes – Creates a rich, hearty base.
- Tomato Paste – Thickens the chili and intensifies the tomato flavor.
Want to take it to the next level? Some hunters swear by a splash of strong coffee or a square of dark chocolate to add a subtle richness to the chili.
Cooking the Ultimate Venison Camp Chili Recipe
Now that we have all the right ingredients, it’s time to bring them together! A good venison camp chili recipe isn’t just about tossing everything into a pot—it’s about layering flavors and allowing time for the ingredients to meld into something rich and deeply satisfying. Whether you’re cooking over an open fire, on a stovetop, or in a slow cooker, this step-by-step guide will ensure you make the best campfire venison chili possible.
How to Prepare and Cook Venison Camp Chili Recipe Like a Pro
Properly Handling and Prepping Venison
Since venison is lean, it requires a bit of preparation to get the best results in chili. Here’s how to ensure your meat stays tender and flavorful:
- Trim Silver Skin & Connective Tissue – This helps remove any unwanted chewiness.
- Pat the Meat Dry – Moisture prevents browning, so drying the venison first ensures a good sear.
- Season Lightly Before Cooking – A pinch of salt and pepper before browning helps bring out the meat’s natural flavors.
Tip: If using ground venison, mix in a tablespoon of olive oil or beef tallow to prevent it from drying out.
Chopping and Measuring Ingredients Ahead of Time
When cooking at camp or at home, mise en place (having everything prepped and ready) makes the process smoother. Before starting, chop all your vegetables, measure out your spices, and have your liquids ready.
Cooking Process
Browning the Meats
The first step in making venison chili is to sear the meat. Browning enhances the overall depth of flavor by creating a caramelized crust.
- Heat a large pot over medium-high heat and add a splash of oil.
- Sear the venison in batches, cooking for 3–4 minutes until browned. Avoid overcrowding the pot to ensure proper browning.
- Remove the meat and set it aside while you prepare the base.
Why brown the meat first? This step locks in flavor and gives the chili a richer taste.
Sautéing Vegetables and Building the Base
Once the venison is browned, it’s time to build the foundation of the chili:
- Add chopped onions and bell peppers to the pot, cooking until softened (about 5 minutes).
- Stir in the garlic, cooking for another minute until fragrant.
- Add tomato paste and dry spices, stirring well to coat the vegetables and release their aroma.
- Deglaze the pot by adding a splash of broth or crushed tomatoes, scraping up any browned bits from the bottom.
Those little browned bits? They’re packed with flavor! Deglazing helps incorporate them into the chili.
Combining Ingredients and Simmering
Now, it’s time to bring everything together:
- Return the venison to the pot.
- Pour in the broth and tomatoes. Stir everything together and bring to a boil.
- Reduce the heat to low and let it simmer uncovered for at least 1.5 to 2 hours, stirring occasionally.
- If using beans, add them in the last 30 minutes to prevent them from overcooking.
The longer it simmers, the richer it gets! If time allows, let the chili cook for up to 3 hours for the best depth of flavor.
Cooking Methods
Traditional Stovetop Method
This is the go-to method for cooking venison chili at home or at camp.
- Cook time: 2–3 hours
- Heat control: Simmering on low ensures all flavors meld together beautifully.
Slow Cooker Adaptation
If you’re making venison camp chili in a slow cooker, here’s how to adjust the process:
- Brown the venison in a skillet before transferring it to the slow cooker.
- Sauté onions, garlic, and spices in the same pan. Then, deglaze with a bit of broth.
- Transfer everything to the slow cooker and add remaining ingredients.
- Cook on low for 6–8 hours or high for 4–5 hours.
Slow cookers are great for letting the flavors develop without constant supervision!
Instant Pot Variation
Need chili fast? The Instant Pot speeds up the process while still delivering rich flavors.
- Use the “Sauté” function to brown the venison and cook the onions, garlic, and spices.
- Add the remaining ingredients, seal the lid, and set to “Pressure Cook” for 25 minutes.
- Allow for 10 minutes of natural pressure release before opening the lid and stirring.
Pressure cooking locks in deep flavors in a fraction of the time!
How to Serve and Enjoy Venison Camp Chili Recipe
After hours of slow cooking, your venison camp chili is rich, thick, and bursting with deep flavors. Now comes the best part—serving it up! While this chili is fantastic on its own, pairing it with the right sides and toppings can elevate the experience. Let’s explore the best ways to serve this hearty dish.
Perfect Side Dishes to Pair with Venison Camp Chili Recipe
Breads and Crackers
Nothing beats a warm, crusty bite alongside a steaming bowl of wild game chili. Here are some classic and rustic options:
- Cornbread – A slightly sweet contrast to the spice of the chili.
- Buttermilk Biscuits – Buttery and flaky, perfect for soaking up every last drop.
- Rustic Campfire Bread – If you’re at deer camp, fresh-baked bread in a Dutch oven is a game-changer.
- Saltine Crackers – Simple yet effective for adding crunch.
Tip: Want extra flavor? Try jalapeño cornbread with melted cheese on top!
Toppings and Garnishes
A bowl of chili is a blank canvas for creative toppings. Whether you like it creamy, tangy, or spicy, these add-ons will take it up a notch:
- Shredded Cheese – Cheddar, Monterey Jack, or Colby add a rich, melty texture.
- Sour Cream or Greek Yogurt – Cools down the heat and adds creaminess.
- Fresh Cilantro or Green Onions – Adds a fresh, herby kick.
- Sliced Avocado – For an extra layer of creaminess.
- Crushed Tortilla Chips – A great way to add crunch and a hint of corn flavor.
Feeling adventurous? Try topping it with a squeeze of fresh lime for a pop of acidity!
Beverage Pairings
Best Drinks to Complement Venison Chili
A warm, spicy bowl of venison chili calls for something refreshing to balance the flavors. Here are some great options:
- Iced Tea (Sweet or Unsweetened) – A classic, thirst-quenching choice.
- Sparkling Water with Citrus – Bubbles + lime or lemon = perfection.
- Apple Cider (Hot or Cold) – A great fall-inspired pairing for campfire chili.
Need a cozy drink at camp? Try a warm mug of cinnamon-spiced cider alongside your chili!
Part 6: Storage and Reheating
Before we dive into FAQs and the conclusion, let’s quickly cover the best ways to store, freeze, and reheat your venison camp chili so you can enjoy it long after the pot has cooled.
Properly Storing and Reheating Leftover Chili
Refrigeration Guidelines
Chili actually tastes better the next day! The flavors continue to meld, making it even richer. To store it properly:
- Let the chili cool to room temperature before refrigerating.
- Store in an airtight container to prevent it from absorbing other fridge odors.
- Consume within 3–4 days for the best flavor and freshness.
Pro Tip: A drizzle of broth or a splash of water while reheating keeps the chili from thickening too much.
Freezing Tips
Chili is a freezer-friendly meal that reheats beautifully. Here’s how to do it right:
- Use freezer-safe containers or resealable bags for portioning.
- Leave about an inch of space at the top of containers (chili expands as it freezes).
- Freeze for up to 3 months for the best taste and texture.
Label your container with the date! Trust me, it’s easy to forget how long it’s been in there.
Reheating Methods
- Stovetop: Heat over low-medium heat, stirring occasionally, until warm.
- Microwave: Heat in short bursts, stirring in between to avoid cold spots.
- Slow Cooker: Great for large batches—set on low and stir occasionally until warmed through.
Frequently Asked Questions (FAQs)
Can I use other types of meat if I don’t have venison?
Absolutely! Venison chili can be made with elk, bison, beef, turkey, or even a combination of meats. Just keep in mind that lean meats like venison need a bit more moisture or fat to prevent dryness.
How can I reduce the gamey flavor of venison?
If venison tastes a little too strong for your liking, try these tricks:
- Soak the meat in milk or buttermilk for a few hours before cooking.
- Trim off all silver skin and connective tissue (this is where most of the gamey taste comes from).
- Use bold spices and slow cooking to let the flavors develop.
Is it necessary to include beans in chili?
Nope! Some chili purists insist that true camp chili is bean-free. Others love the texture and added protein. It’s entirely up to you! If skipping beans, consider adding extra meat or vegetables for heartiness.
What are some vegetarian alternatives for this recipe?
To make a meatless venison-style chili, substitute mushrooms, lentils, black beans, or jackfruit for the meat. You’ll still get a rich, satisfying dish with all the bold flavors of classic chili.
How long can I store the chili in the freezer?
Venison camp chili stays good for up to 3 months in the freezer when stored in airtight containers. Beyond that, it’s still safe to eat, but the texture and flavor might start to degrade.
Can I make this chili in a slow cooker or Instant Pot?
Yes!
- Slow Cooker: Brown the venison first, then cook everything on low for 6–8 hours or high for 4–5 hours.
- Instant Pot: Sauté the venison and veggies, then pressure cook on high for 25 minutes with a 10-minute natural release.
Conclusion: The Perfect Bowl of Venison Camp Chili
And there you have it—the ultimate venison camp chili recipe! From selecting the best cuts of wild game meat to customizing the spice level and pairing it with perfect sides, this chili is built for hearty appetites and warm gatherings. Whether you’re cooking it over an open fire at deer camp or enjoying it at home, this dish is sure to be a favorite.
Now, grab your pot, fire up the stove (or campfire), and get cooking! And hey—if you put your own twist on this recipe, don’t be shy—share your experience and variations!