
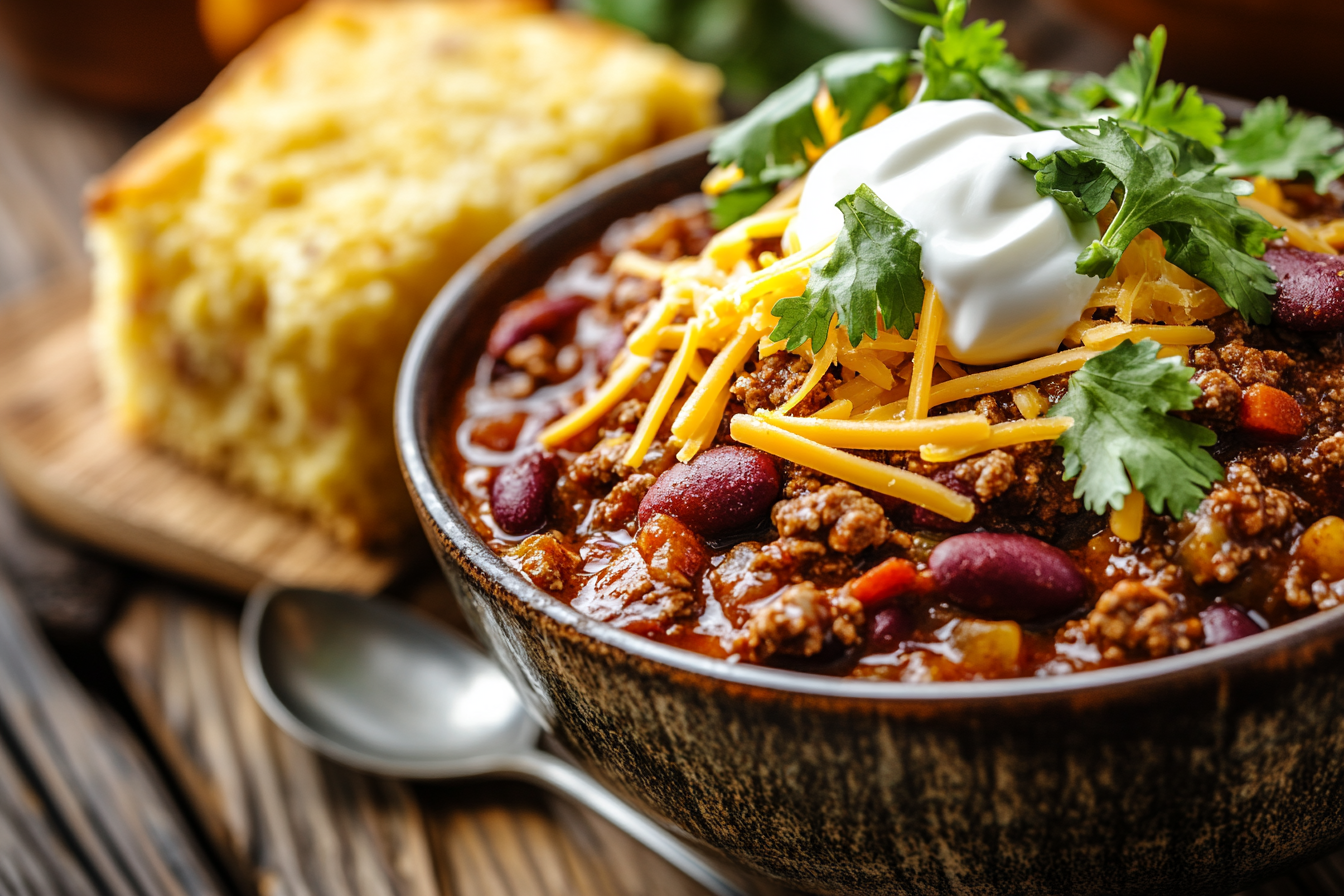
Introduction
Chili lovers know that the right meat makes all the difference! When it comes to making a hearty, flavorful bowl of chili, venison is an excellent choice. However, not all cuts of venison are equal in texture, fat content, or tenderness, making some better suited for chili than others.
In this comprehensive guide, we’ll explore what cut of venison is best for chili, why some cuts work better than others, and how to prepare and cook venison for a rich, delicious chili. We’ll also dive into cooking methods, complementary ingredients, seasoning tips, and even how to reduce that distinct gamey taste that sometimes comes with venison.
If you want to master the art of venison chili, buckle up—this guide will take you from selecting the best cut to serving a perfect bowl!
Understanding Venison Cuts
Overview of Venison Cuts
Venison, known for its lean, rich flavor, comes from various parts of the deer, each offering distinct characteristics. Unlike beef, venison has minimal fat, meaning some cuts require slow cooking to break down connective tissues, while others are naturally tender. Here’s a breakdown of the primary venison cuts:
- Shoulder (Forequarter): A tough but flavorful cut, ideal for slow-cooked dishes like chili.
- Neck Meat: Contains connective tissue, making it perfect for slow-simmered recipes.
- Shank: Tough but gelatinous, adding depth and body to chili.
- Backstrap (Loin): Exceptionally tender but lacks the connective tissue needed for chili.
- Tenderloin: Too delicate for chili, better suited for quick-searing.
- Hindquarter (Rounds): Lean and versatile but requires careful preparation for chili.
Factors to Consider When Choosing a Cut for Chili
Selecting the best venison meat for chili isn’t just about flavor; several factors affect the outcome:
Tenderness and Cooking Time
Venison shoulder and neck require long, slow cooking to break down tough fibers. The result? Melt-in-your-mouth meat that infuses every bite with deep, gamey goodness.
Flavor Profile
Some cuts have a stronger, earthier taste, which can enhance chili’s complexity. Shoulder and neck cuts absorb spices and seasonings beautifully, while backstrap can be too mild.
Fat Content and Moisture Retention
Because venison is naturally lean, slow-cooked cuts with connective tissues (like shank and shoulder) release collagen, creating a thick, hearty chili. Adding a bit of healthy fat—such as beef tallow or butter—can also help maintain juiciness.
Venison’s distinct qualities make it both a challenge and an opportunity for chili enthusiasts. Choosing the right cut ensures a satisfying texture, rich flavor, and unforgettable taste!
Best Venison Cuts for Chili
Recommended Cuts for Venison Chili
When crafting a bold and flavorful venison chili, selecting the right cut makes all the difference. The best cuts for chili are those with a good amount of connective tissue, ensuring the meat becomes tender and juicy after slow cooking. Let’s explore the top picks.
Shoulder (Forequarter) Cuts – The Best Choice
The venison shoulder is a go-to cut for chili. It’s rich in connective tissue, which breaks down beautifully during slow cooking, adding body to the chili while keeping the meat moist. Since the shoulder gets a lot of movement, it’s naturally tough, making it perfect for long, slow-simmered dishes.
⭐ Why Use Shoulder?
Deep, robust flavor
Becomes fall-apart tender when slow-cooked
Ideal for absorbing spices and seasonings
Pro Tip: Trim excess sinew and silver skin before cooking to prevent chewiness.
Neck Meat – A Hidden Gem
Venison neck meat often gets overlooked, but it’s one of the best cuts for chili. This cut contains plenty of connective tissue, which transforms into gelatin when cooked low and slow, creating a thick, velvety sauce.
⭐ Why Use Neck Meat?
Full-bodied, rich flavor
Adds natural thickness to chili
Budget-friendly and often underutilized
Pro Tip: Slow-cook neck meat whole, then shred it into the chili for added texture.
Shank – Tough but Worth It
The venison shank is another underrated choice for chili. Though extremely tough, shank meat is packed with collagen, which breaks down into a silky, mouth-coating texture that enhances the broth. The result? A deeply flavorful, restaurant-quality chili.
⭐ Why Use Shank?
Creates a luscious, rich consistency
Intensifies the depth of flavor in chili
Requires longer cooking but delivers exceptional results
Pro Tip: Cube the shank meat into small pieces to speed up the tenderizing process.
Cuts to Avoid for Chili
While some cuts excel in chili, others fall short. Here’s what to skip:
Backstrap (Loin) – Too Tender for Chili
The venison backstrap is highly prized for its tenderness, but that’s precisely why it doesn’t work for chili. This cut is best suited for quick-seared dishes like steaks or medallions.
🚫 Why Avoid Backstrap?
✖ Lacks connective tissue, so it won’t develop the rich texture chili needs
✖ Dries out quickly when slow-cooked
Tenderloin – Wasted in Chili
Similar to the backstrap, venison tenderloin is best for grilling or pan-searing. It’s incredibly tender but doesn’t hold up well to slow-cooking.
🚫 Why Avoid Tenderloin?
✖ Too delicate for chili’s long cooking process
✖ Doesn’t contribute to the overall depth of flavor
By choosing the right venison cut for chili, you’ll elevate your dish from ordinary to extraordinary. Now that you know the best cuts, let’s move on to how to properly prepare venison for chili!
Preparing Venison for Chili
Proper Preparation Techniques
Now that we’ve selected the best venison meat for chili, it’s time to prep it the right way. Venison requires a bit more attention than beef due to its lean nature and unique texture. Proper preparation ensures the meat stays tender, flavorful, and free from any unwanted gamey taste.
Trimming and Cleaning – Removing the Tough Bits
Venison contains silver skin, a tough, fibrous membrane that won’t break down during cooking. If left intact, it can make your chili chewy and unpleasant.
⭐ How to Trim Venison Properly:
Use a sharp knife to remove silver skin and excess connective tissue.
Trim off any sinew or gristle—these won’t soften in chili.
Remove excess fat (venison fat can have a strong, waxy taste).
Pro Tip: While trimming, cut the meat into 1-inch cubes—this size works best for chili, ensuring each piece remains tender while soaking up maximum flavor.
Cutting Techniques – Best Sizes for Chili Meat
Should you cube or grind your venison for chili? That depends on texture preference.
✔ Cubed Venison: Gives the chili a hearty, meaty bite. Ideal for slow-simmering.
✔ Ground Venison: Absorbs flavors quickly and cooks faster. Best if blended with a bit of fat.
Pro Tip: If using ground venison, consider adding a small amount of beef tallow or butter to improve moisture retention.
Marinating – Enhancing Flavor & Reducing Gamey Taste
Some cuts of venison carry a mild gamey taste, which can be balanced with the right marinade. While chili spices help mask any strong flavors, marinating beforehand can further enhance tenderness and remove any unwanted bitterness.
⭐ Best Marinades for Venison Chili:
✔ Acid-Based Marinades: Apple cider vinegar, lime juice, or buttermilk help break down tough fibers and mellow out gamey flavors.
✔ Savory Marinades: Worcestershire sauce, soy sauce, or garlic-infused oil deepen the flavor profile.
Pro Tip: Marinate venison for at least 2 hours (or overnight) for best results. Pat dry before browning to ensure a perfect sear.
Browning Venison – The Key to Maximum Flavor
Before tossing the meat into your chili pot, take a moment to brown it properly. Searing venison locks in juices and builds a rich, deep flavor that elevates the entire dish.
Heat a heavy-bottomed pot or Dutch oven over medium-high heat.
Add a small amount of cooking oil (olive oil or beef tallow works well).
Sear the venison cubes in batches to prevent steaming.
Let the meat develop a golden-brown crust before removing it from the pan.
Pro Tip: Browning also creates flavorful fond (those browned bits at the bottom of the pan). Deglaze with a splash of broth or tomato sauce to incorporate this rich flavor into your chili.
With your venison perfectly prepped, trimmed, and browned, it’s time to dive into the best cooking methods for venison chili!
Cooking Methods for Venison Chili
Now that we’ve prepped and browned our venison meat for chili, it’s time to bring everything together with the perfect cooking method. Venison’s lean nature requires careful cooking to keep it tender, and the right technique can make all the difference. Whether you prefer a slow cooker, pressure cooker, or stovetop simmering, each method offers unique advantages.
Slow Cooking – The Best Method for Tender Venison
If you want fall-apart tender venison, slow cooking is the way to go. This method allows all the flavors to meld together while gently breaking down the meat’s connective tissues, making it melt-in-your-mouth delicious.
⭐ How to Cook Venison Chili in a Slow Cooker:
Brown venison in a skillet before adding it to the slow cooker for extra depth.
Add onions, garlic, and peppers, letting them soften slightly before mixing with the meat.
Pour in crushed tomatoes, beef broth, and your favorite chili spices.
Set the slow cooker on low for 6–8 hours (or high for 4 hours) until the meat is fork-tender.
Stir occasionally and adjust seasoning as needed.
Pro Tip: Add beans in the last hour of cooking to prevent them from becoming mushy.
Pressure Cooking – Quick and Flavorful
Short on time? A pressure cooker (like an Instant Pot) can deliver rich, slow-cooked flavor in a fraction of the time. The high-pressure environment locks in moisture, making even tough cuts of venison incredibly tender.
⭐ How to Cook Venison Chili in a Pressure Cooker:
Sauté venison, onions, and garlic using the “Sauté” function.
Deglaze the pot with a splash of broth or crushed tomatoes to prevent burning.
Add spices, beans, and liquid ingredients, then seal the lid.
Cook on high pressure for 30 minutes, followed by a natural release for 10 minutes.
Pro Tip: If your chili is too thin after cooking, set the pot to “Sauté” mode and let it simmer for 5–10 minutes to thicken.
Stovetop Simmering – Traditional & Time-Tested
For those who love old-school, hands-on cooking, stovetop simmering allows the most control over the chili’s texture and consistency. A heavy-bottomed Dutch oven works best for maintaining even heat.
⭐ How to Cook Venison Chili on the Stovetop:
Brown the venison in a large pot over medium-high heat.
Sauté aromatics (onions, garlic, peppers) until fragrant.
Stir in tomatoes, broth, and seasonings, bringing everything to a gentle simmer.
Reduce heat to low and cover, letting the chili simmer for at least 2–3 hours, stirring occasionally.
Pro Tip: The longer you simmer, the better the flavors develop. If the chili thickens too much, add a splash of broth to maintain consistency.
Each cooking method brings out unique characteristics in the chili, so choose the one that best fits your time and preference. Now that we’ve mastered the cooking process, let’s explore how to enhance the flavor of venison chili with the perfect ingredients and seasonings!
Enhancing Venison Chili Flavor
Cooking the perfect venison chili isn’t just about using the right cut or method—it’s also about balancing flavors to create a rich, savory, and well-rounded dish. Since venison is lean and slightly gamey, pairing it with the right ingredients is essential for maximizing taste. Let’s explore how to build deep, complex flavors in your chili.
Complementary Ingredients for the Best Venison Chili
Adding the right mix of vegetables, beans, and spices ensures your venison chili is hearty and packed with flavor. Here’s what works best:
Best Beans for Venison Chili
While some traditional chili recipes skip beans, they can add texture and bulk to venison chili meat selection. The best choices include:
Kidney Beans – Classic option, firm and meaty.
Black Beans – Earthy and slightly sweet, complementing venison’s richness.
Pinto Beans – Creamy and absorb flavors well.
Great Northern Beans – Milder in taste, letting venison take center stage.
Pro Tip: If using canned beans, rinse them first to remove excess sodium.
Vegetables & Aromatics for Depth
While meat is the star, aromatics and vegetables help round out the flavor. Some must-haves:
Onions & Garlic – The backbone of any chili, adding depth and savoriness.
Bell Peppers – A touch of sweetness balances out venison’s lean profile.
Jalapeños or Green Chilies – For a mild kick, enhancing warmth without overpowering heat.
Tomatoes – Provide acidity, which helps break down tough meat fibers.
Pro Tip: Fire-roasted tomatoes add a smoky depth to chili that pairs beautifully with venison.
Essential Spices & Herbs for Venison Chili
Venison pairs well with bold, aromatic spices that enhance its natural flavors. The best spice combinations for chili include:
Chili Powder – The foundation of any chili, adding smoky heat.
Cumin – Earthy and slightly citrusy, balancing gamey notes.
Paprika (Smoked or Sweet) – Adds warmth and mild sweetness.
Oregano – Enhances the savory and herby undertones.
Coriander – Lends a subtle citrus flavor that brightens the chili.
Cinnamon or Cocoa Powder (Optional) – A tiny pinch deepens the flavor, adding complexity.
Pro Tip: Toast your spices in a dry pan before adding them to the chili to intensify their aroma.
Balancing Gamey Flavor in Venison Chili
Since venison has a naturally earthy, slightly gamey taste, balancing it with acidity and subtle sweetness makes all the difference.
Using Acids to Soften the Gamey Taste
Tomatoes & Tomato Paste – Adds natural acidity to counteract strong gamey notes.
Apple Cider Vinegar or Lime Juice – A splash toward the end brightens the dish.
Worcestershire Sauce or Soy Sauce – Deepens umami, adding a rich, meaty essence.
Adding Sweet Elements for Flavor Balance
A touch of sweetness can help balance the bitterness sometimes found in venison:
Molasses or Brown Sugar – Adds depth without overpowering.
Carrots or Sweet Peppers – Natural sweetness balances acidity.
Dark Chocolate (Unsweetened) – Just a pinch enriches the flavor profile without tasting like dessert.
Pro Tip: Don’t overdo sweetness—just a hint is enough to smooth out venison’s natural flavors.
With all the flavors in perfect harmony, it’s time to serve up the chili! Next, we’ll explore serving suggestions and the best ways to store venison chili for later enjoyment.
Frequently Asked Questions (FAQs)
Many people have questions when making venison chili, especially when it comes to choosing the right cut, handling gamey flavors, and cooking methods. Below are some of the most frequently asked questions, with clear, practical answers to help you perfect your dish.
Can I Use Ground Venison for Chili?
Yes! Ground venison works well for chili, but because it’s lean, it may lack the juiciness and texture of cubed meat.
✔ Solution: If using ground venison, consider blending it with a small amount of beef fat or tallow to enhance moisture. Brown it well before adding to the chili to develop deeper flavor.
How Do I Reduce the Gamey Taste in Venison Chili?
The gamey flavor in venison comes from its lean meat and natural diet. While some people enjoy it, others prefer a milder taste.
✔ Ways to Reduce Gamey Flavor:
- Marinate the meat in buttermilk, vinegar, or Worcestershire sauce before cooking.
- Use acidic ingredients like tomatoes or lime juice to balance flavors.
- Slow-cook with strong aromatics (onions, garlic, cumin) to mellow out the taste.
Is It Necessary to Add Fat to Venison When Making Chili?
Since venison is much leaner than beef, adding a bit of fat can help maintain a juicy, flavorful chili.
✔ Best Fats to Use:
- Beef tallow or butter (adds richness)
- Olive oil (for a healthier option)
- Pork fat (if mixing meats for a heartier chili)
What Are the Best Beans to Use in Venison Chili?
Venison chili works well with a variety of beans that add texture and soak up the flavors of the broth.
✔ Best Beans for Chili:
- Kidney beans – Classic choice, firm and hearty.
- Black beans – Earthy, slightly sweet, great with venison.
- Pinto beans – Creamy and mild, complementing chili spices.
Pro Tip: Add beans in the last hour of cooking to prevent them from turning mushy.
How Long Should I Cook Venison Chili?
Venison needs low and slow cooking to become tender and flavorful. Cooking time depends on your chosen method:
Slow Cooker: 6–8 hours on low (best for deep flavor).
Stovetop Simmering: 2–3 hours on low, stirring occasionally.
Pressure Cooker (Instant Pot): 30 minutes on high pressure, followed by natural release.
Pro Tip: Chili often tastes better the next day as the flavors continue to develop overnight!
Can I Make Venison Chili Ahead of Time?
Absolutely! In fact, chili often tastes better when made ahead, as the spices and flavors meld together.
✔ Storage Tips:
- Refrigerate: Store in an airtight container for up to 4 days.
- Freeze: Keep in freezer-safe bags or containers for up to 3 months.
- Reheat: Warm on the stovetop over low heat, adding a splash of broth if needed.
Conclusion
By now, you’ve learned everything you need to know about making the perfect venison chili—from choosing the best cut of venison to enhancing flavors and avoiding common mistakes. Whether you prefer slow cooking, pressure cooking, or stovetop simmering, the key to delicious, tender venison chili lies in selecting the right cut, balancing flavors, and cooking it low and slow.
Key Takeaways:
Best Cuts for Chili: Shoulder, neck, and shank are ideal for their rich connective tissues.
Preparation is Crucial: Trim silver skin, marinate if needed, and brown the meat before simmering.
Cooking Methods: Slow cooking is best, but stovetop and pressure cooking also work well.
Flavor Balance: Acidity, spices, and a touch of fat can enhance the taste and texture.
Storage Tips: Chili tastes even better the next day! Refrigerate for up to 4 days or freeze for up to 3 months.
Final Thoughts
Venison chili isn’t just a hearty meal—it’s an experience. The deep, rich flavors of slow-cooked venison combined with bold spices create a satisfying, comforting dish that’s perfect for any occasion. Whether you’re using fresh venison from a hunting trip or store-bought cuts, following these guidelines will ensure a mouthwatering bowl of chili every time.
So, grab your ingredients, fire up the stove (or slow cooker), and get ready to enjoy a bowl of the best venison chili you’ve ever made!